The Complete Guide to Ice Cream Makers: Create Delicious Frozen Treats at Home
Introduction to Ice Cream Makers
There's something magical about homemade ice cream. The rich, creamy texture, the ability to customize flavors, and the satisfaction of creating frozen treats from scratch make owning an ice cream maker a worthwhile investment for any dessert lover. This comprehensive guide explores everything you need to know about ice cream makers, from understanding different types to mastering the art of homemade frozen desserts. An ice cream maker transforms simple ingredients—cream, sugar, and flavorings—into smooth, delicious ice cream through a process of churning and freezing. Whether you're a casual dessert enthusiast or an aspiring artisan ice cream creator, understanding these machines opens up a world of frozen possibilities.How Ice Cream Makers Work
The Science of Ice Cream Making
Creating smooth ice cream requires understanding the science behind the process: Freezing and Churning: Ice cream makers simultaneously freeze the mixture while churning it. This dual action serves two critical purposes: lowering the temperature to solidify the mixture and incorporating air while breaking up ice crystals. Ice Crystal Formation: Without churning, frozen cream would form large ice crystals, resulting in a grainy, icy texture. Continuous agitation during freezing creates tiny ice crystals that give ice cream its characteristic smooth texture. Air Incorporation (Overrun): Churning incorporates air into the mixture, increasing volume and creating a lighter texture. Commercial ice cream typically has 50-100% overrun, while homemade versions usually have 20-50%. Fat Distribution: The churning process evenly distributes fat globules throughout the mixture, contributing to creaminess and smooth mouthfeel. Emulsification: Proper churning ensures that water and fat remain evenly mixed, preventing separation and creating a stable, uniform product.Key Components of Ice Cream Makers
Understanding the main components helps you choose and use your machine effectively: Freezing Mechanism: This is what cools the mixture. Different types use various methods: pre-frozen bowls, built-in compressors, or ice and salt combinations. Dasher/Paddle: The rotating component that churns the mixture. Design varies by model, but all serve to agitate the mixture and scrape frozen portions from the walls. Canister/Bowl: The container holding the ice cream mixture during freezing. Material and design affect freezing efficiency. Motor: Powers the dasher rotation. Motor strength affects churning consistency and the machine's ability to handle thickening mixtures. Lid: Covers the canister during operation, often featuring an opening for adding ingredients mid-churn.Types of Ice Cream Makers
Freezer Bowl Ice Cream Makers
The most popular home option, these machines use a double-walled bowl containing cooling liquid: How They Work: The bowl must be pre-frozen (usually 12-24 hours) before use. Once frozen, the bowl is placed in the machine, the mixture is added, and the dasher churns while the frozen bowl provides cooling. Advantages:- Affordable price point ($30-$100)
- Simple operation
- Compact storage
- Quiet operation
- No ice or salt required
- Requires advance planning (pre-freezing)
- Limited to one batch per freezing cycle
- Bowl must fit in freezer
- Freezing capacity diminishes over time
Compressor Ice Cream Makers
These machines contain built-in refrigeration units: How They Work: A compressor and refrigerant system actively cools the canister during operation, similar to a refrigerator. No pre-freezing required. Advantages:- No pre-freezing needed
- Make multiple batches consecutively
- Consistent freezing temperature
- Professional-quality results
- Faster freezing times
- Higher cost ($200-$500+)
- Heavier and bulkier
- Louder operation
- Higher energy consumption
Rock Salt and Ice Machines
The traditional method using ice and rock salt: How They Work: The canister sits in a bucket surrounded by ice and rock salt. Salt lowers the ice's melting point, creating temperatures cold enough to freeze the mixture. Manual or electric churning agitates the mixture. Advantages:- Nostalgic, traditional experience
- No electricity needed (manual versions)
- Educational for children
- Large batch capacity available
- Inexpensive
- Requires ice and rock salt
- Messy operation
- Manual versions require physical effort
- Less consistent results
- Longer freezing times
Soft Serve Machines
Specialized machines for soft-serve style ice cream: How They Work: These machines freeze and dispense ice cream at a slightly warmer temperature than hard ice cream, creating the characteristic soft texture. Advantages:- Authentic soft-serve texture
- Continuous dispensing capability
- Fun presentation
- Popular with children
- Limited to soft-serve style
- Higher cost
- Larger footprint
- More complex cleaning
Choosing the Right Ice Cream Maker
Capacity Considerations
Select capacity based on your needs: Small (1-1.5 quarts): Suitable for individuals or couples. Makes enough for 4-6 servings per batch. Medium (1.5-2 quarts): Ideal for small families. Produces 6-8 servings per batch. Large (2+ quarts): Best for larger families or entertaining. Some commercial-style units make 4+ quarts.Features to Look For
Consider these features when shopping: Timer: Automatic shut-off prevents over-churning and allows unattended operation. Transparent Lid: Allows monitoring without opening, plus easy ingredient addition. Ingredient Chute: Opening for adding mix-ins during the final minutes of churning. Multiple Speed Settings: Different speeds for various frozen dessert types. Keep Cool Function: Maintains finished ice cream at serving temperature. Removable Parts: Dishwasher-safe components simplify cleaning. Recipe Book: Included recipes help beginners get started.Build Quality and Durability
Invest in quality for long-term satisfaction: Motor Strength: Stronger motors handle thicker mixtures without straining. Bowl Material: Stainless steel bowls are durable and conduct cold efficiently. Construction: Sturdy housing withstands regular use and vibration. Warranty: Longer warranties indicate manufacturer confidence in durability.Essential Ingredients for Homemade Ice Cream
Dairy Components
Understanding dairy's role helps create better ice cream: Heavy Cream: The primary fat source, contributing richness and smooth texture. Higher fat content (36-40%) produces creamier results. Whole Milk: Adds body without excessive richness. The balance of cream to milk affects final texture. Half-and-Half: A middle ground between cream and milk, useful for lighter ice creams. Egg Yolks: Used in custard-based (French-style) ice cream, yolks add richness, color, and help emulsify the mixture.Sweeteners
Sugar does more than add sweetness: Granulated Sugar: The standard sweetener, dissolves easily and provides clean sweetness. Corn Syrup: Prevents crystallization and adds chewiness. Use sparingly. Honey: Adds distinct flavor and helps prevent ice crystals. Substitute 3/4 cup for each cup of sugar. Maple Syrup: Provides unique flavor profile. Works well in fall-inspired flavors. Alternative Sweeteners: Sugar alcohols and artificial sweeteners can be used but may affect texture.Stabilizers and Emulsifiers
These ingredients improve texture and shelf life: Egg Yolks: Natural emulsifier that creates smooth, rich ice cream. Cornstarch: Thickens the base and helps prevent ice crystals. Gelatin: Small amounts improve texture and slow melting. Guar Gum: Commercial stabilizer that prevents ice crystal formation. Xanthan Gum: Another commercial option for improved texture.Flavorings and Add-Ins
The creative possibilities are endless: Vanilla: The classic flavor. Use pure vanilla extract or vanilla bean for best results. Chocolate: Cocoa powder, melted chocolate, or chocolate chips. Fruit: Fresh, frozen, or pureed fruits add natural flavor and color. Nuts: Toasted nuts add crunch and flavor complexity. Cookies and Candy: Crushed cookies, candy pieces, and chocolate chunks. Liqueurs: Alcohol lowers freezing point, so use sparingly (1-2 tablespoons per quart). Spices: Cinnamon, nutmeg, ginger, and other spices create unique flavors.Ice Cream Base Recipes
Philadelphia-Style (No Eggs)
The simplest approach, relying on cream for richness: Basic Recipe:- 2 cups heavy cream
- 1 cup whole milk
- 3/4 cup sugar
- Pinch of salt
- 1 tablespoon vanilla extract
- Combine milk and sugar, stirring until sugar dissolves
- Add cream, salt, and vanilla
- Chill mixture thoroughly (at least 4 hours or overnight)
- Churn according to machine instructions
French-Style (Custard Base)
Egg yolks create richer, silkier ice cream: Basic Recipe:- 2 cups heavy cream
- 1 cup whole milk
- 3/4 cup sugar
- 4 large egg yolks
- Pinch of salt
- 1 tablespoon vanilla extract
- Heat milk and half the sugar until steaming
- Whisk yolks with remaining sugar until pale
- Slowly temper hot milk into yolks
- Return to heat, cook until mixture coats a spoon (170-175°F)
- Strain into cream, add vanilla and salt
- Chill thoroughly before churning
Vegan Ice Cream Base
Dairy-free options for those with restrictions: Coconut Milk Base:- 2 cans (13.5 oz each) full-fat coconut milk
- 1/2 cup sugar
- 2 tablespoons cornstarch
- Pinch of salt
- Flavorings as desired
- Whisk cornstarch with 1/4 cup coconut milk
- Heat remaining coconut milk with sugar until simmering
- Whisk in cornstarch mixture, cook until thickened
- Add salt and flavorings
- Chill thoroughly before churning
Mastering Ice Cream Making Techniques
Preparing the Base
Proper base preparation ensures success: Dissolve Sugar Completely: Undissolved sugar creates grainy texture. Heat gently if needed. Chill Thoroughly: Cold bases freeze faster, creating smaller ice crystals. Chill at least 4 hours, preferably overnight. Age the Base: Resting the base overnight allows flavors to meld and proteins to hydrate, improving texture. Strain the Mixture: Straining removes any lumps or cooked egg bits for smoother results.Churning Tips
Optimize the churning process: Don't Overfill: Leave room for expansion. Fill canister only 2/3 full. Monitor Consistency: Ice cream is ready when it reaches soft-serve consistency and pulls away from the sides. Timing Matters: Most batches take 20-30 minutes. Over-churning creates buttery texture. Add Mix-Ins Late: Add chunks and pieces during the last 5 minutes of churning. Work Quickly: Transfer finished ice cream to containers promptly to prevent melting.Hardening and Storage
Proper storage maintains quality: Hardening: Transfer soft ice cream to freezer-safe containers and freeze for 2-4 hours until firm. Container Choice: Use shallow, wide containers for faster freezing. Press plastic wrap directly onto surface to prevent ice crystals. Storage Temperature: Store at 0°F or below for best quality. Shelf Life: Homemade ice cream is best within 1-2 weeks. Quality declines over time. Serving: Let ice cream soften at room temperature for 5-10 minutes before scooping.Troubleshooting Common Problems
Ice Cream Too Icy
Causes and solutions: Insufficient Fat: Increase cream ratio or add egg yolks. Too Much Water: Reduce milk or use higher-fat dairy. Slow Freezing: Ensure bowl is fully frozen or compressor is working properly. Improper Storage: Store at consistent, cold temperature. Over-Churning: Stop churning at soft-serve consistency.Ice Cream Too Soft
Address softness issues: Insufficient Churning: Continue churning until mixture thickens properly. Warm Base: Ensure base is thoroughly chilled before churning. Too Much Sugar or Alcohol: Reduce these ingredients, which lower freezing point. Freezer Temperature: Verify freezer is cold enough (0°F or below).Ice Cream Too Hard
Create scoopable texture: Increase Sugar: Sugar lowers freezing point, keeping ice cream softer. Add Corn Syrup: Replace some sugar with corn syrup for softer texture. Increase Fat: Higher fat content creates softer ice cream. Add Alcohol: Small amounts of vodka or liqueur prevent rock-hard freezing.Grainy or Gritty Texture
Achieve smoothness: Dissolve Sugar: Ensure sugar is completely dissolved before churning. Strain Base: Remove any undissolved particles. Proper Churning: Maintain consistent churning speed. Quick Freezing: Faster freezing creates smaller ice crystals.Creative Flavor Ideas
Classic Flavors
Master these timeless favorites: Vanilla Bean: Split and scrape a vanilla bean into the base for intense flavor and visual appeal. Chocolate: Add 1/2 cup cocoa powder and 4 oz melted chocolate to the base. Strawberry: Fold 2 cups macerated strawberries into finished ice cream. Mint Chocolate Chip: Add peppermint extract and chocolate chips. Coffee: Steep 1/4 cup coffee beans in warm cream, or add 2 tablespoons instant espresso.Gourmet Combinations
Elevate your ice cream game: Salted Caramel: Swirl homemade caramel sauce and add flaky sea salt. Brown Butter Pecan: Brown the butter before making custard, add toasted pecans. Lavender Honey: Steep dried lavender in cream, sweeten with honey. Olive Oil and Sea Salt: Drizzle quality olive oil and sprinkle sea salt. Balsamic Strawberry: Add aged balsamic to strawberry ice cream.Seasonal Inspirations
Match flavors to the seasons: Spring: Lemon curd, strawberry basil, honey lavender Summer: Peach, blueberry cheesecake, watermelon sorbet Fall: Pumpkin spice, apple pie, maple walnut Winter: Peppermint bark, gingerbread, eggnogInternational Flavors
Explore global inspirations: Italian: Stracciatella, pistachio, amaretto French: Crème brûlée, lavender, chestnut Japanese: Matcha, black sesame, mochi Mexican: Cinnamon, Mexican chocolate, dulce de leche Indian: Mango, cardamom, roseBeyond Ice Cream: Other Frozen Treats
Gelato
Italian-style frozen dessert: Differences from Ice Cream:- Lower fat content (4-8% vs 10-18%)
- Less air incorporation
- Served at warmer temperature
- More intense flavors
Sorbet
Dairy-free frozen fruit dessert: Basic Formula:- 2 cups fruit puree
- 1 cup simple syrup
- 2 tablespoons lemon juice
Frozen Yogurt
Tangy, lighter alternative: Basic Recipe:- 2 cups Greek yogurt
- 1/2 cup sugar
- 1/2 cup milk
- Flavorings as desired
Sherbet
Fruit-based with small amount of dairy: Characteristics: Contains 1-2% milk fat, lighter than ice cream but creamier than sorbet. Basic Approach: Add 1/2 cup milk or cream to sorbet base.Maintenance and Care
Cleaning Your Ice Cream Maker
Proper cleaning extends machine life: After Each Use:- Remove and wash all removable parts
- Wipe down motor base with damp cloth
- Dry all components thoroughly before storage
- Wash with warm soapy water
- Never use abrasive cleaners
- Dry completely before freezing
- Store in freezer for readiness
- Allow to cool before cleaning
- Clean canister and dasher after each use
- Wipe exterior regularly
- Ensure ventilation openings remain clear
Storage Tips
Store your machine properly: Freezer Bowls: Keep in freezer, ready for spontaneous ice cream making. Compressor Units: Store in cool, dry location with adequate ventilation space. Accessories: Keep dashers, lids, and accessories together for easy access. Cord Management: Avoid kinking or tightly wrapping power cords.Health Considerations
Nutritional Aspects
Understanding ice cream nutrition: Calories: Homemade ice cream typically contains 200-300 calories per 1/2 cup serving. Fat Content: Traditional recipes contain 10-18% fat from cream. Sugar: Standard recipes use 12-16% sugar by weight. Protein: Dairy provides some protein, increased with egg yolks.Healthier Alternatives
Reduce calories and fat: Lower-Fat Options: Substitute some cream with milk or half-and-half. Sugar Reduction: Use sugar substitutes or reduce sugar by 25%. Fruit-Based: Emphasize fruit purees for natural sweetness. Protein Addition: Add protein powder or Greek yogurt. Portion Control: Use smaller serving sizes.Dietary Accommodations
Adapt recipes for special diets: Dairy-Free: Use coconut milk, almond milk, or cashew cream. Egg-Free: Use Philadelphia-style bases or commercial stabilizers. Sugar-Free: Use approved sugar substitutes, adjusting for sweetness and texture. Low-Carb/Keto: Use heavy cream, sugar substitutes, and limit fruit.Ice Cream Maker Accessories
Essential Accessories
Enhance your ice cream making: Extra Freezer Bowls: Make multiple batches without waiting for refreezing. Ice Cream Containers: Proper storage containers with tight-fitting lids. Ice Cream Scoop: Quality scoop for perfect portions. Thermometer: Monitor custard temperature for food safety. Fine Mesh Strainer: Essential for smooth custard bases.Nice-to-Have Items
Additional helpful tools: Immersion Blender: Quickly blend bases and puree fruits. Ice Cream Sandwich Molds: Create uniform sandwiches. Popsicle Molds: Make frozen pops from ice cream base. Waffle Cone Maker: Fresh cones elevate the experience. Toppings Containers: Organize and display toppings attractively.Conclusion
An ice cream maker opens up a world of frozen dessert possibilities, from classic vanilla to creative gourmet flavors. Understanding how these machines work, choosing the right type for your needs, and mastering basic techniques empowers you to create delicious homemade ice cream that surpasses store-bought options. Whether you opt for an affordable freezer bowl model or invest in a compressor machine, the joy of homemade ice cream is within reach. Start with basic recipes, experiment with flavors, and don't be afraid to get creative. The perfect scoop awaits. Remember that great ice cream comes from quality ingredients, proper technique, and a little patience. With practice, you'll develop an intuition for creating frozen treats that delight family and friends. Your ice cream maker isn't just an appliance—it's a gateway to countless sweet memories and delicious moments.Related News
Discover insights, trends, and stories from our team. Stay updated with the latest news and expert perspectives on design, technology, and innovation.
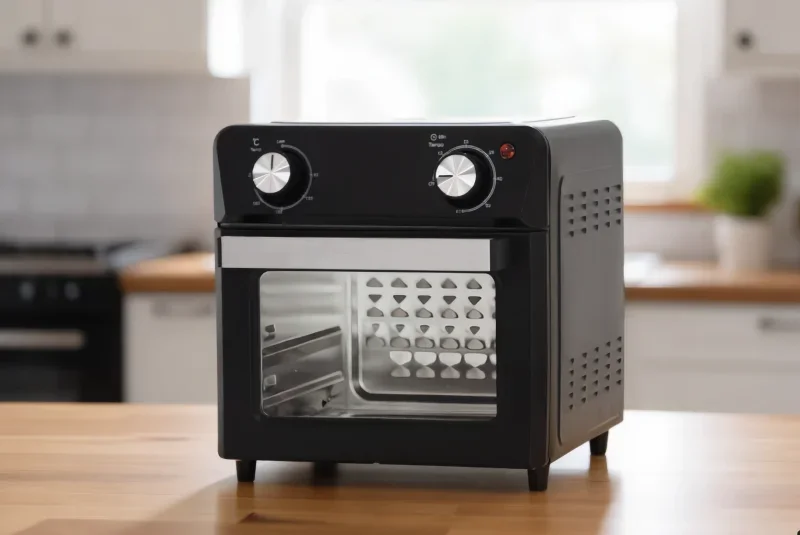
The Ultimate Guide to Airfryer Ovens: Everything You Need to Know in 2025
Introduction to Airfryer Ovens The airfryer oven has revolutionized modern kitchens, offering a healthier alternative to traditional deep frying while delivering the same crispy, delicious results. This comprehensive guide explores everything you need to know about airfryer ovens, from how they wor...
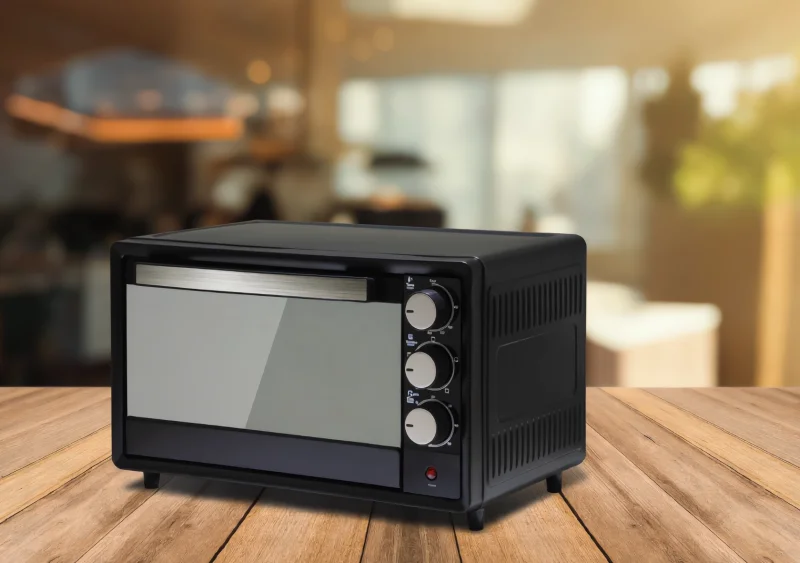
Complete Guide to Electric Ovens: Your Essential Kitchen Companion
Introduction to Electric Ovens The electric oven stands as one of the most essential appliances in modern kitchens worldwide. From baking delicate pastries to roasting succulent meats, the electric oven provides consistent, reliable heat that transforms raw ingredients into culinary masterpieces. T...